

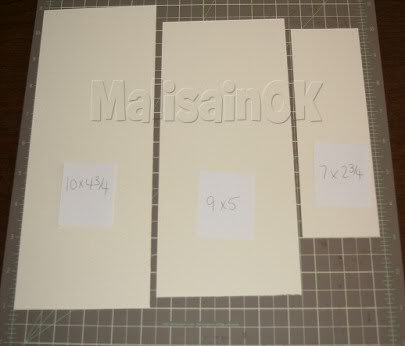
You need 2 pieces of cardstock. Cut the first one to 10 x 4 3/4,
the second piece to 9 x 5 and 7 x 2 3/4.
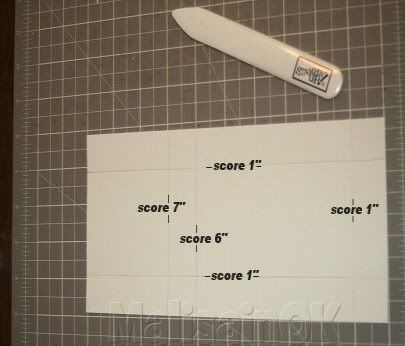
On the largest piece you're going to score on the 10" side at
1" on both sides.
Then on the 4 3/4" side you're going to score at 1", 6" and 7".
You're going to cut out the 1" piece on the 7" scored piece.
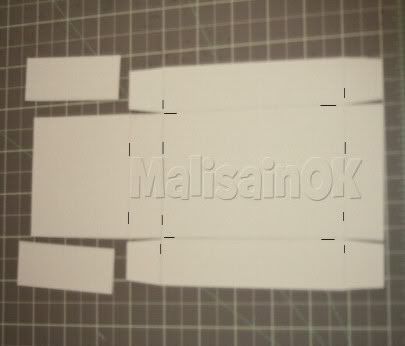
Then cut your slits as shown.
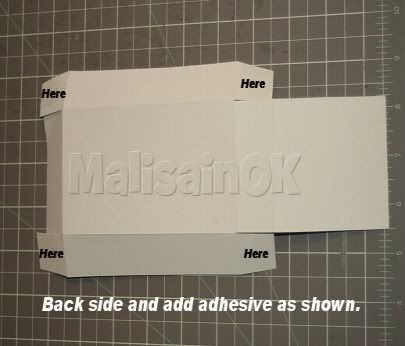
Then you're going to add your adhesive to the BACK SIDE and then fold
your tabs in.
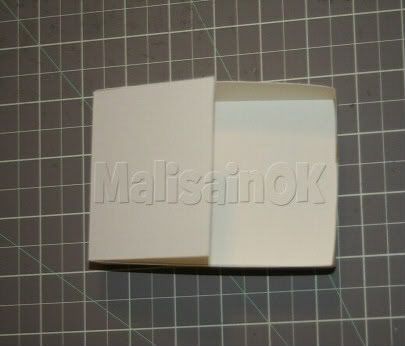
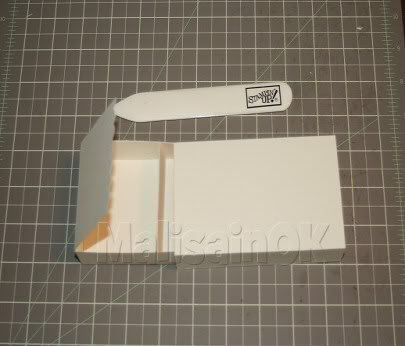
This is what your first box should look like. Set this piece aside
and get your 9 x 5 piece.
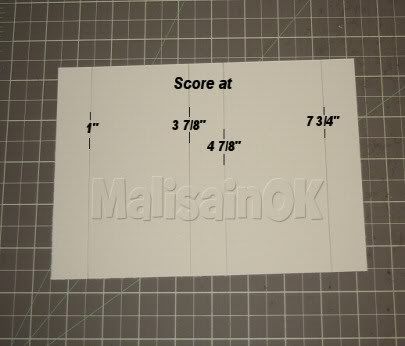
You're going to score this along the 9" side at 1", 3
7/8" 4 7/8" and 7 3/4".
(The 7/8 inch is the little line between the 3/4" and 1".)
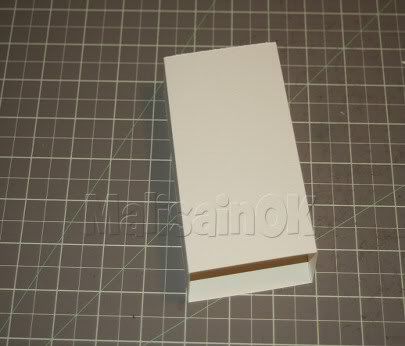
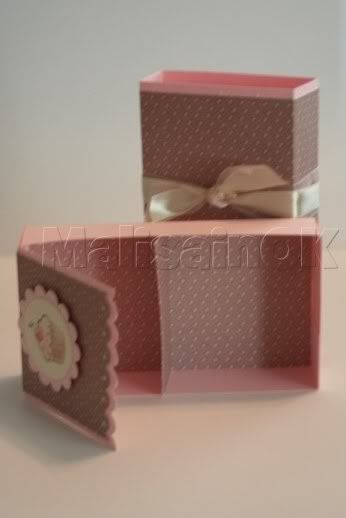
Wrap the box around itself and tape or glue it together. Should look like above.
Set this piece aside and get your 7 x 2 3/4" piece.

You're going to score this on the 7" side at 2 1/2, 3 1/2 and 4
1/2.
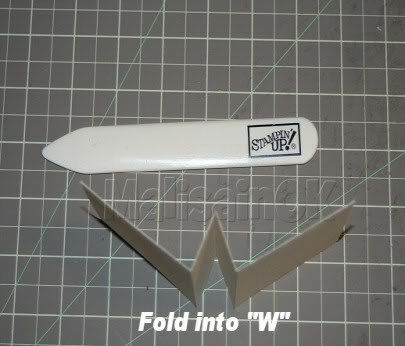
You're going to fold it in half then fold the other score lines the
opposite direction to form a "W".
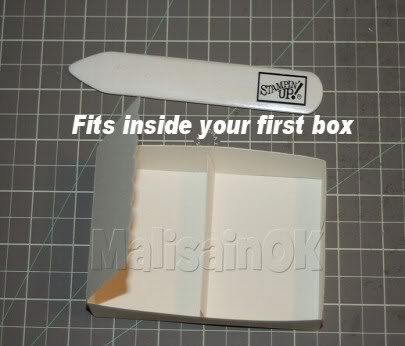
You put your "W" piece into the bottom of your box and slide
the boxes together.