Here is my thrift store haul. It's lots of items I can use in my mini books.
Enjoy!
12.06.2009
My Thrift Store Haul
11.21.2009
Baby Shower Invitation

I thought I'd share my latest SCAL cut. I made this up for a baby shower and wanted to share it with all of you all. If you'd like the cut file please email me or leave a comment with your email address.
11.03.2009

10.27.2009
9.06.2009
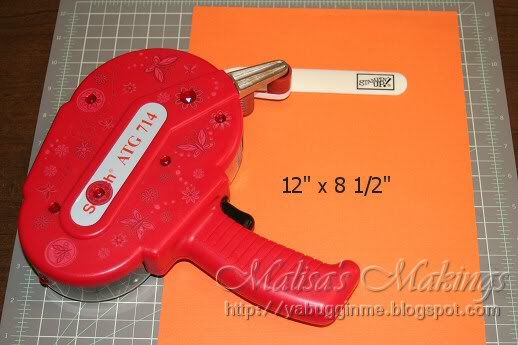
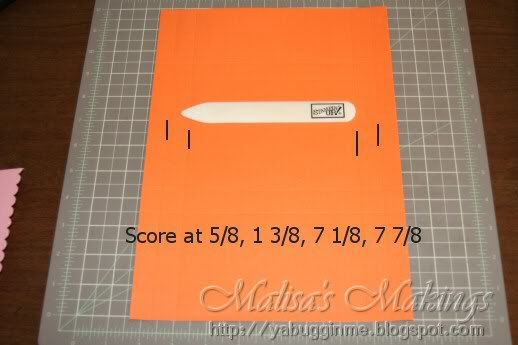
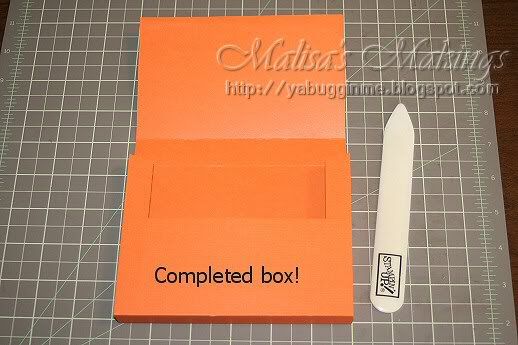
A2 Card Holder
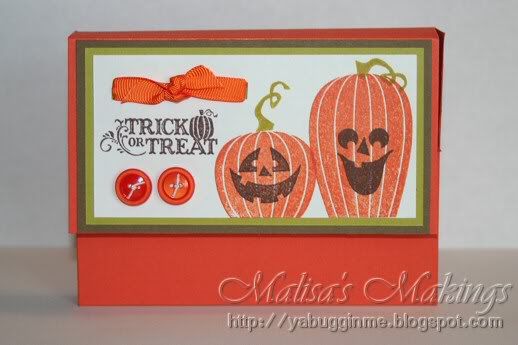

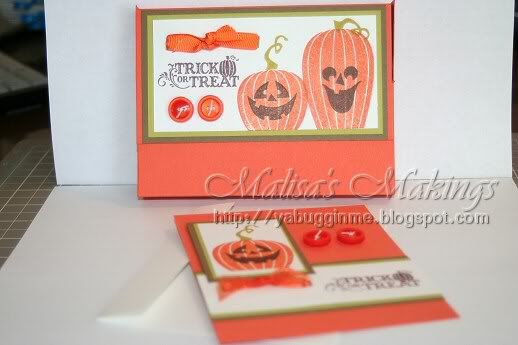
You need a pieces of cardstock that measures 12 x 8 1/2, your paper
trimmer,
bone folder, and adhesive.
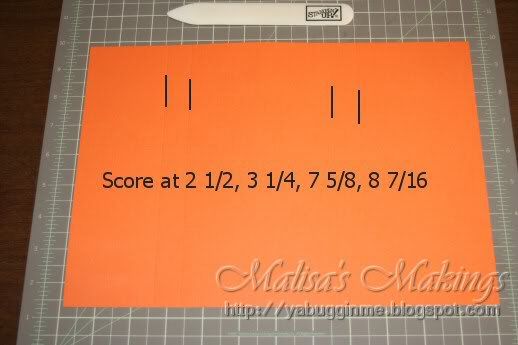
On the 12" side you're going to score at 2 1/2", 3 1/4",
7 5/8", 8 7/16"
On the 8 1/2" side you're going to score at 5/8", 1 3/8",
7 1/8", 7 7/8".
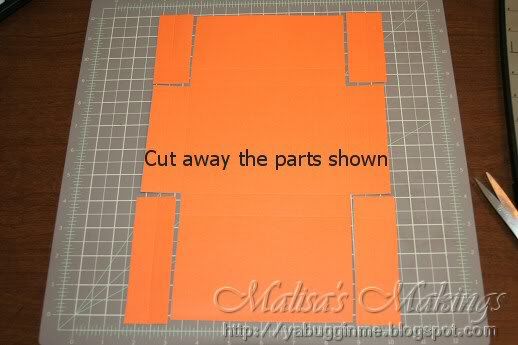
Now you're going to cut away the parts shown below.
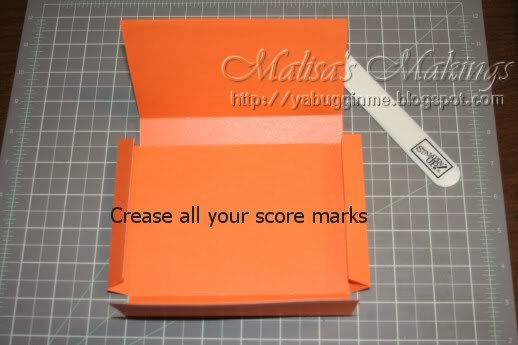
Crease all your score lines.
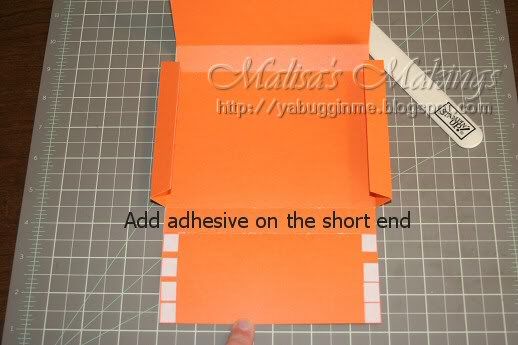
You need to add adhesive to the small end flap.
Now your box is complete. Decorate and enjoy!
8.28.2009
Blog Candy Winners...
Sorry I'm running a little late with this. I have family in town.
Since I had so many enter I decided to do 2 winners. The first one will win all that is pictured. The other person will win some mystery items.
And the winners are...
Grand Prize Winner:
Anonymous said...
Please enter me in your contest. I do not have a blogs and stamping up but I need some new paper.Ginnyginnys_lil_designs@yahoo.comthat's my email
August 7, 2009 3:35 PM
Mystery Box Winner:
tmorrow said...
your blog is great and your tutorials are awesome.
August 5, 2009 6:41 PM
Please email me at malisaleblanc@gmail.com with your home address so I can get your goodies in the mail!
Thank you to everyone for entering and playing along. I apprecaite all of you!
8.16.2009
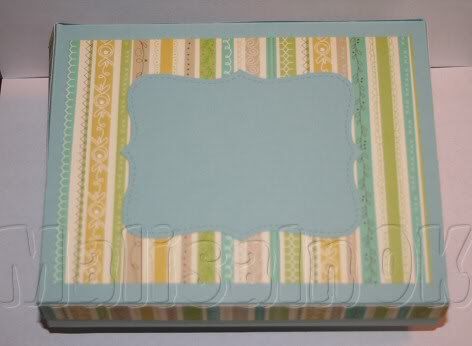
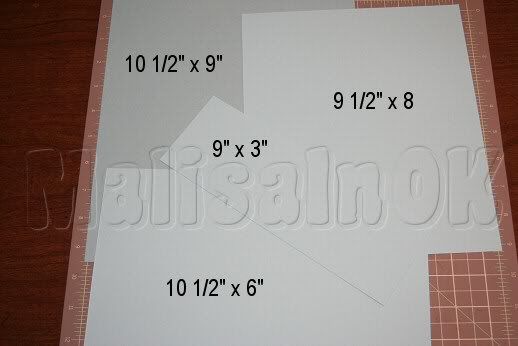
Box W/ Dividers for A2 Cards, Post-It-Notes & Misc.
Box With Dividers for Cards & Post-it-Notes
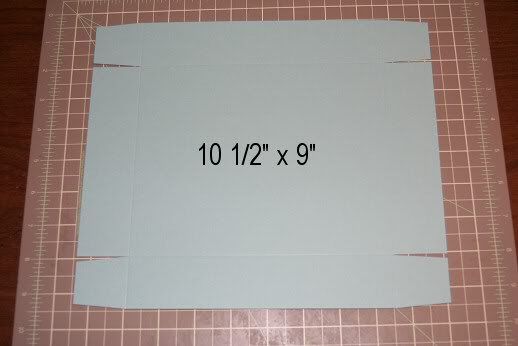
You need 5 pieces of cardstock. 10 1/2" x 9", 9
1/2" x 8", 10 1/2" x 6", 9" x 3", and 9 1/2" x 3
1/2" (Not Shown)
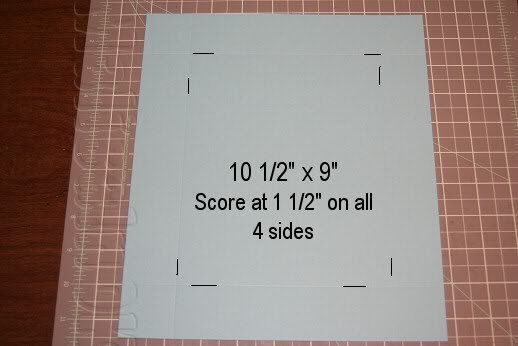
Score the 10 1/2" x 9" at 1 1/2" on all 4 sides.
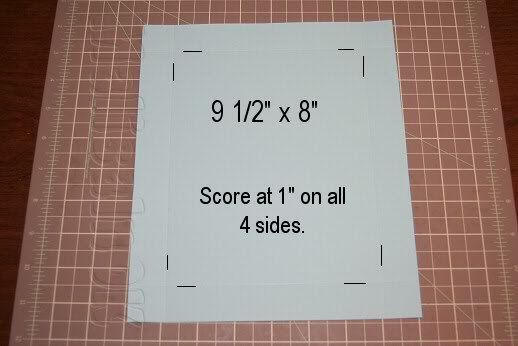
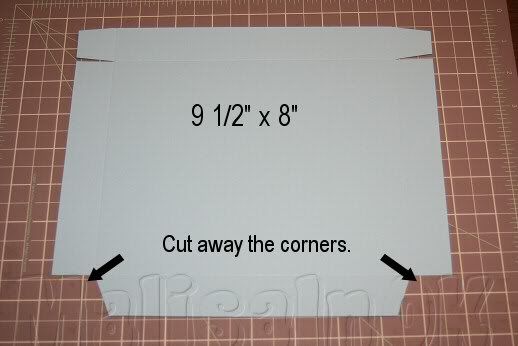
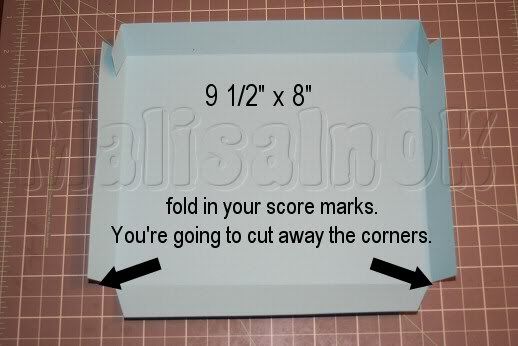
Score the 9 1/2" x 8" at 1" on all 4 sides.
You need to cut the end score marks and then notch them out. This
makes your ends look nicer once they are all attached.
On your 9 1/2" x 8" you need to cut your end score marks in to
the score marks. Then your going to cut off and remove the bottom tabs. I notched these
also.
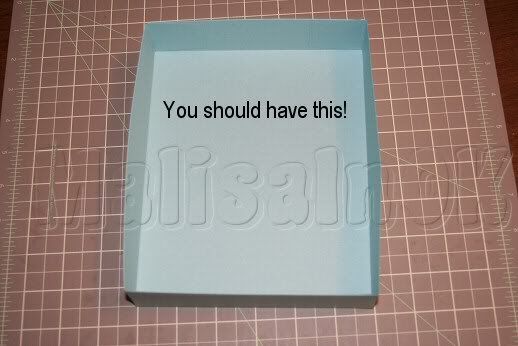
Back to the 10 1/2" x 9" piece you need to fold in and attach
the tabs.
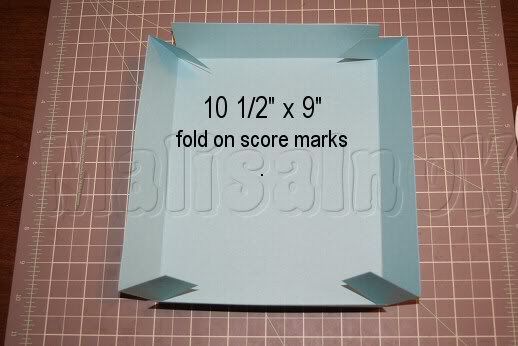
Then using adhesive you need to attach the tabs to the inside of your
box.
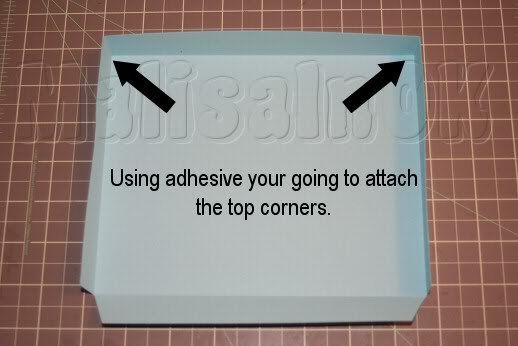
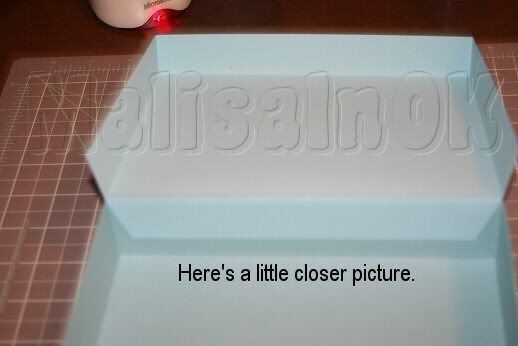
Back to the 9 1/2" x 8 piece and fold in your score marks.
Attach your top tabs inside. This is making the lid to the box.
You need to add adhesive on the back of the long tab and it needs to be
attached to the inside of your bottom box.

Here is another picture of the lid attached to the bottom.
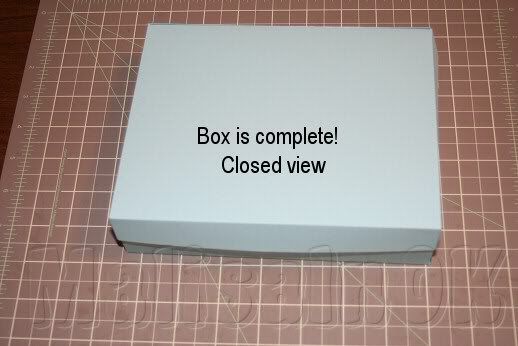
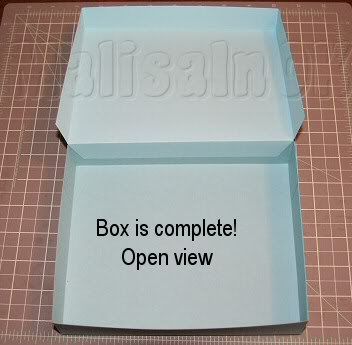
Now your box is complete. The lid should close over the bottom with no
problems.
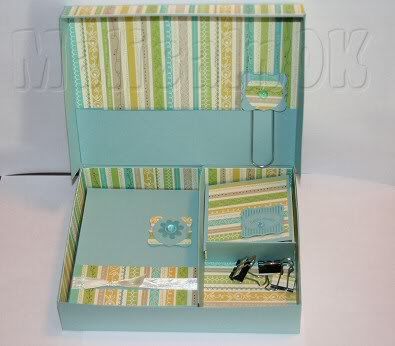
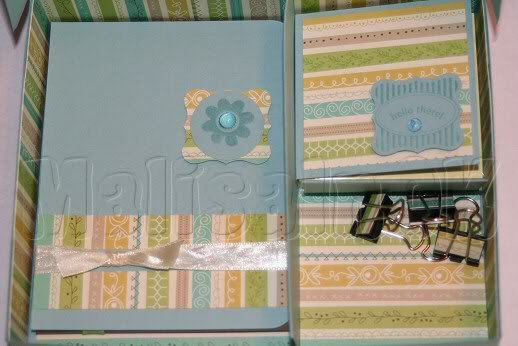
Your complete box open.
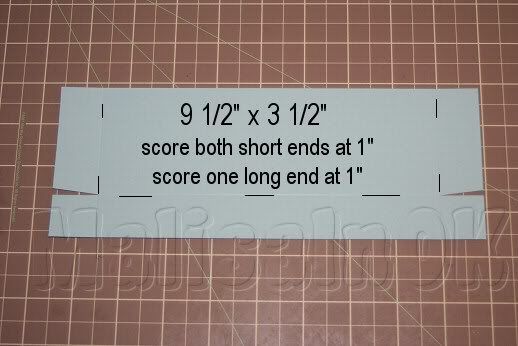
You need your 9 1/2" x 3 1/2" piece. You need to score this
piece at 1" on both short sides and 1 long side.
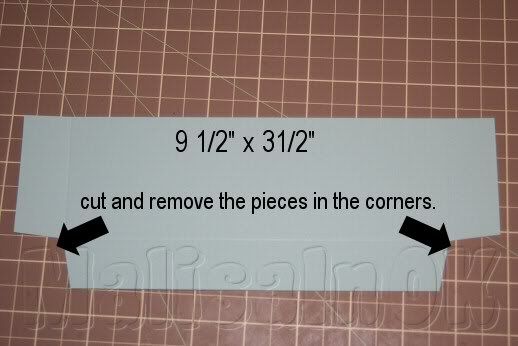
Next you need to cut and notch this piece as shown.
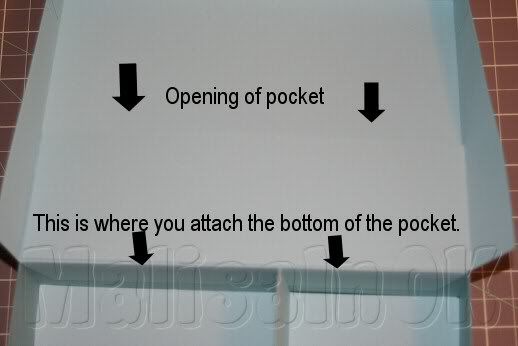
You're going to attach this pocket piece to the lid of your box.
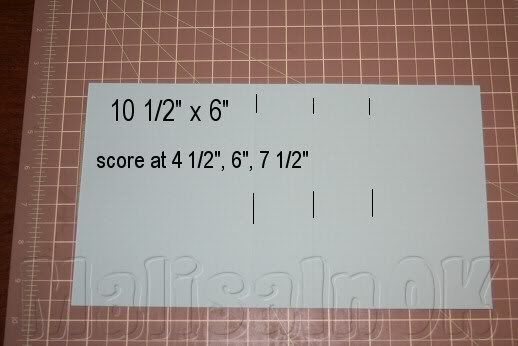
Now you need your 10 1/2" x 6" piece. You need to score this
piece at 4 1/2", 6", 7 1/2"
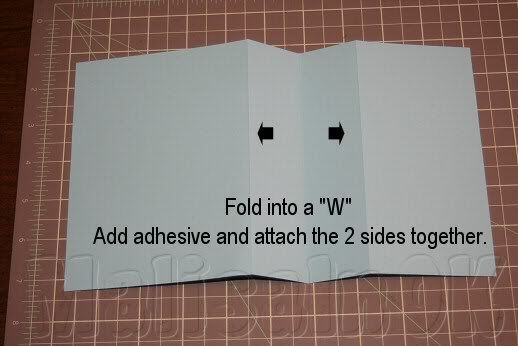
You're going to fold this piece into a "W" as shown. Add
adhesive an attach to make a divider for your bottom of your box.
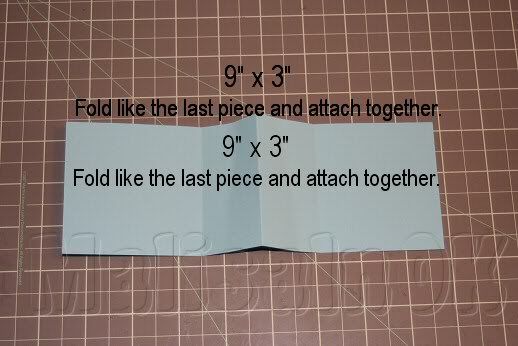
Now you need your 9" x 3" piece. You need to score this piece
at 3", 4 1/2", 6" You need to fold and add adhesive as you did above.
(sorry for the double post in the picture)
This is how your dividers will go in the bottom of your box.
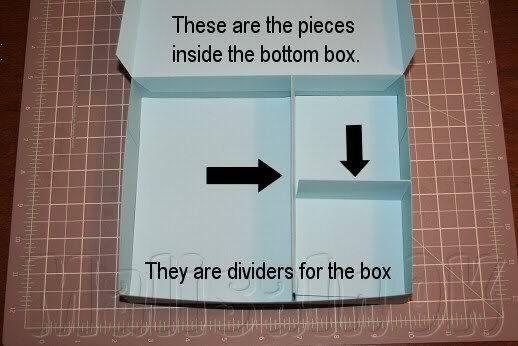
Now your box is complete.
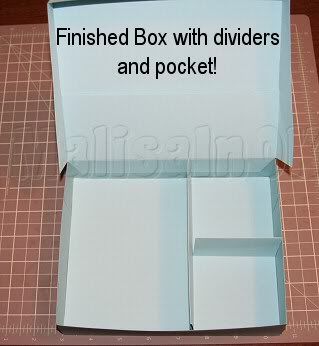
On the left side of your box it will hold your A2 size cards and
envelopes.
I put a post-it-note in the top right and clips in the bottom right. I also added a jumbo
decorated paper clip on the pocket. You can decorate and use it however you'd like!
8.05.2009
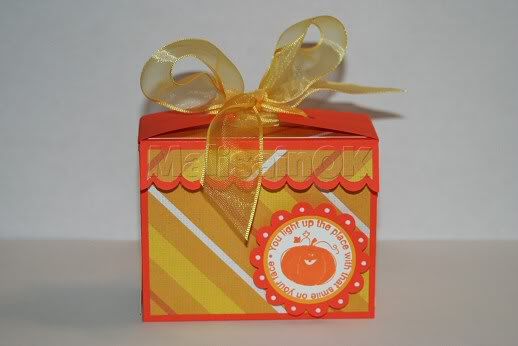
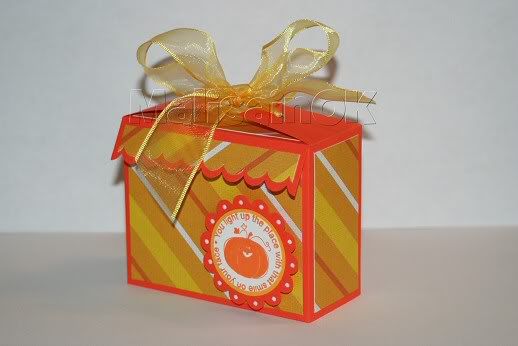
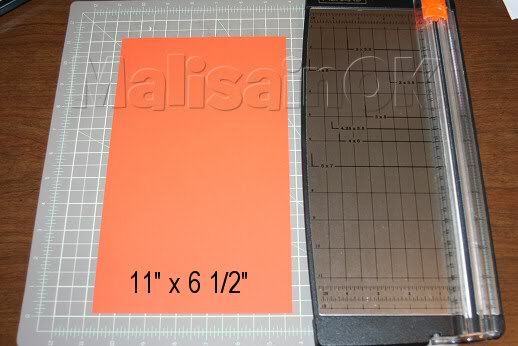
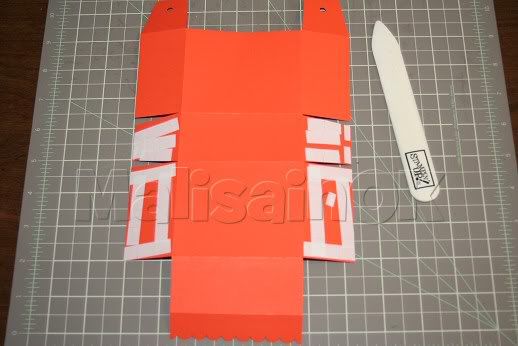
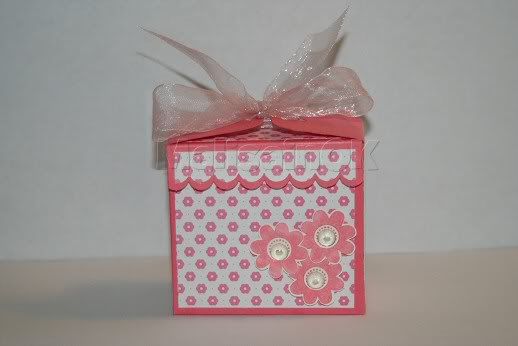
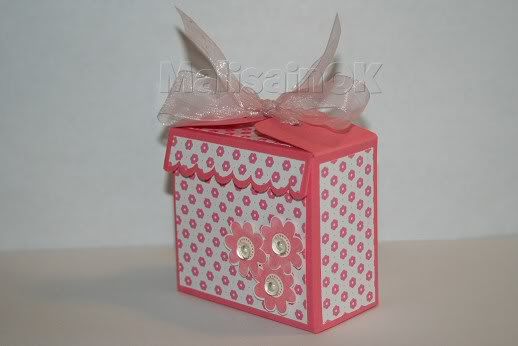
Small Gift Box Tutorial
You need a pieces of cardstock that measures 11 x 6 1/2.
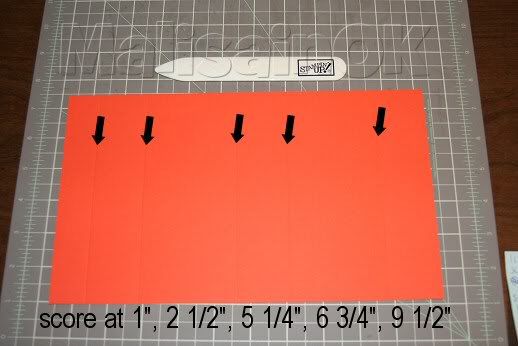
On the 6 1/2" side you're going to score at 1", 2 1/2", 5
1/4", 6 3/4" & 9 1/2"
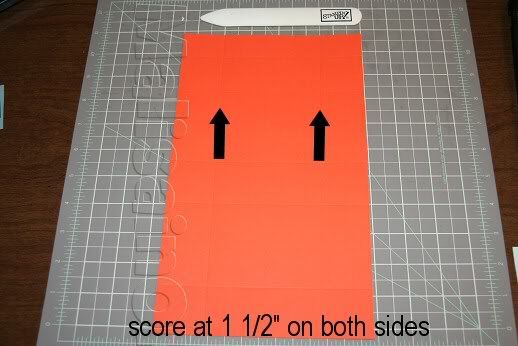
On the 11" side you're going to score both sides at 1 1/2".
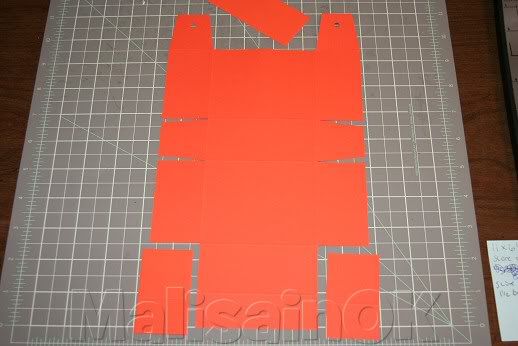
Now you're going to cut away the parts shown below. The 1" score
line is at the bottom of the screen. You're going to cut up to the 2 1/2" score line
and remove that piece on both sides. On the opposite end you're going to cut out and
remove the center piece. I notch out my center flaps so they fold in better. At this time
I also used my crop-o-dile to punch holes in the two tabs at the top. You can also use
your
scallop punch on the other end.
You need to flip your box over and add adhesive as shown.
You need to fold the little tabs in and stick them to the piece with the
adhesive.
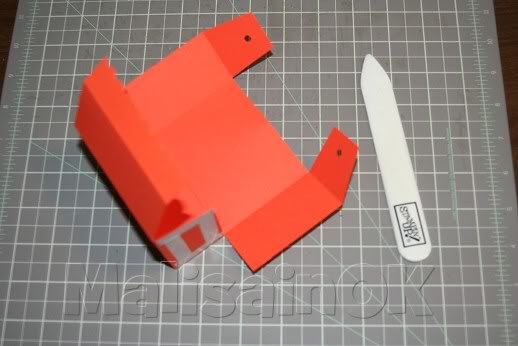
You want to make sure the flaps with the hole punched goes on the outside of the box.
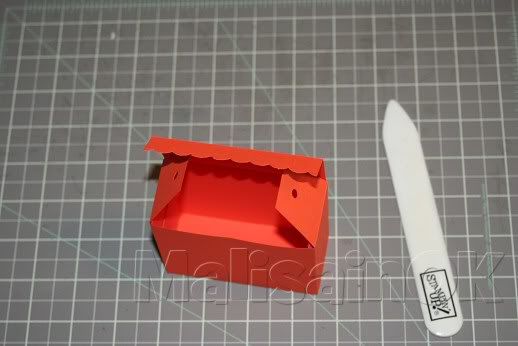
Now you are ready to decorate.
Here are the measurements you need for your designer paper.
1 piece 2 1/2" x 3 1/4" (font)
2 pieces 2 1/2" x 1 1/4" (sides)
1 piece 3 1/4" x 1 1/4" (top)
1 piece 3/4" x 3 1/4" (front flap- scallop)
As you can see I pulled the flaps out and tied with a ribbon. You can
also just tuck these inside your box.
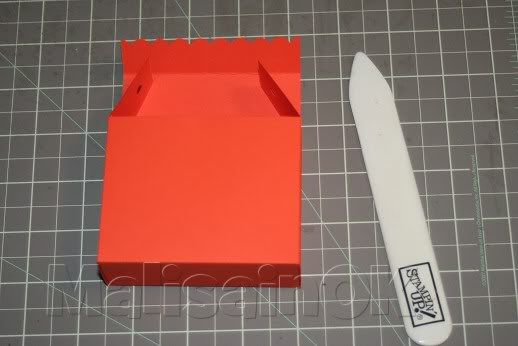
Here is another box just make with cardstock size 11" x 6"
using the same score lines.
Subscribe to:
Posts (Atom)