

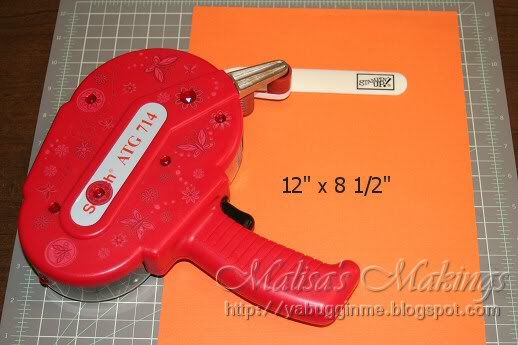
You need a pieces of cardstock that measures 12 x 8 1/2, your paper
trimmer,
bone folder, and adhesive.
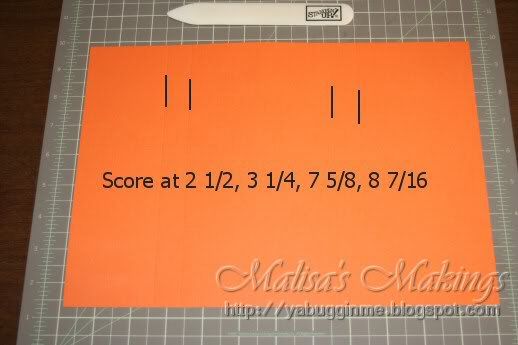
On the 12" side you're going to score at 2 1/2", 3 1/4",
7 5/8", 8 7/16"
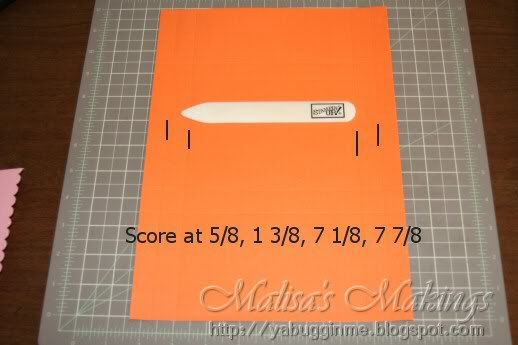
On the 8 1/2" side you're going to score at 5/8", 1 3/8",
7 1/8", 7 7/8".
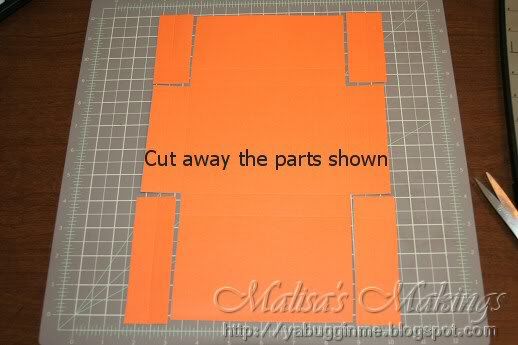
Now you're going to cut away the parts shown below.
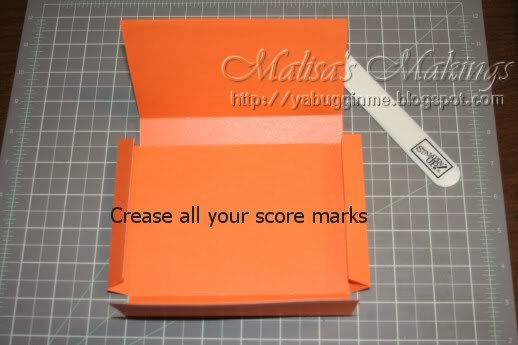
Crease all your score lines.
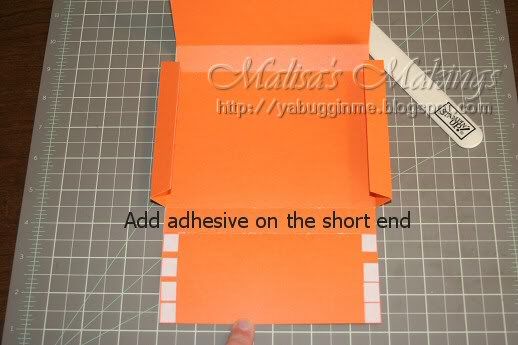
You need to add adhesive to the small end flap.
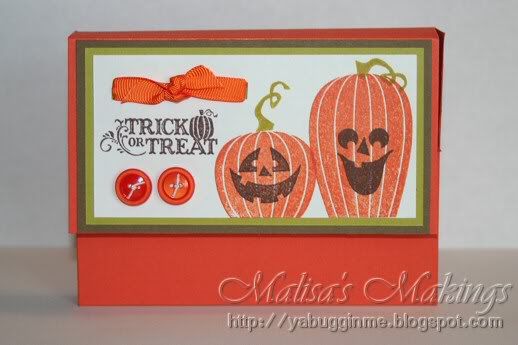
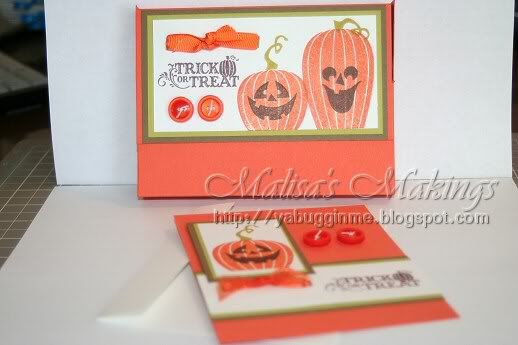
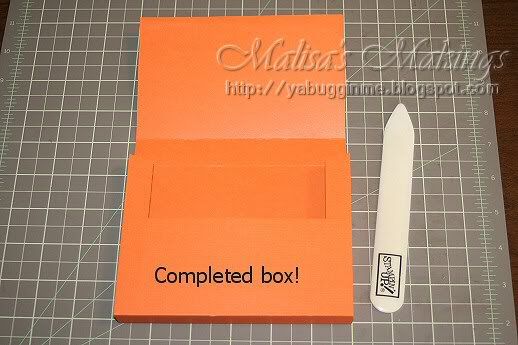
Now your box is complete. Decorate and enjoy!


11 comments:
Very cute. Thanks for the tutorial.
Thanks for the directions for this very useful box! Your Halloween sample is adorable.
You make everything look so easy! Thanks for sharing your creative wisdom with us!
Great tutorial - love the visuals - makes it alot easier to understand. I can't wait to try and make this. Thanks for sharing it with us.
What an cute card box. I love making things like this. Thanks for sharing.
You rock, great tutorial, great pictures, AWESOME project. Thanks.
this is fabulous, great tutorial, thanks...have a wonderful day!
enjoy *~*
miss seeing your posts!
:)
This is SO adorable. I love your box design. The way it opens is so gorgeous! Thank you so much for the fantastic tutorial!
Would try doing this. Thanks for the tutorial.
LOVE this little box. Just tried it and it worked perfectly for a 4-card set I'm giving for Christmas. Thanks so much for your clear instructions!
Post a Comment